
This guide explains how to add an ethernet interface to the meter for less than 30 EUR. WARNING: This document is published for educational purposes only. We do not recommend nor encourage you to reproduce the steps presented in this guide. Do not even think about opening the case unless you are a qualified technician and know what you do. Touching a 220V line can kill you. You have been warned!!
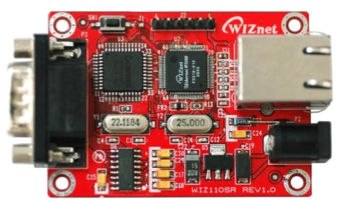
We make use of the following ethernet to serial adaptor (WIZ110SR) offered by WIZnet.
 |
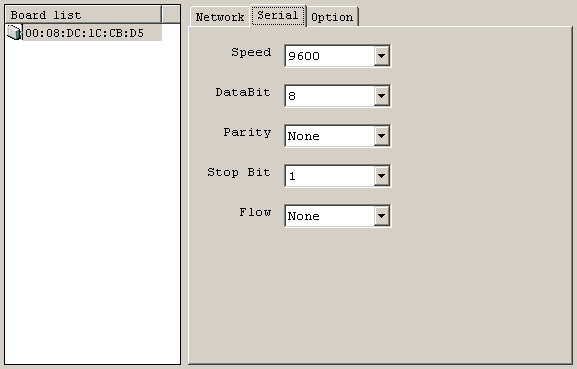
This adaptor comes with a config program that allows to set the IP-Address and serial parameters. Unfortunately the WIZnet config tool is available for Windows only. We use VirtualBox to virtualize a WinXP instance under MacOSX and set the parameters as follows.
 |
The serial interface of the HM8115-2 is preconfigured to 9600 Baud 8N1. We configure the same settings for the WIZnet adaptor.
 |
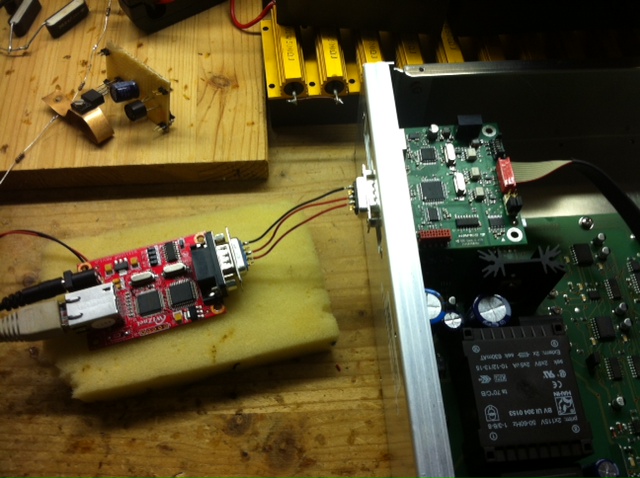
We solder a three wire interface together
- PIN2 ----- PIN2
- PIN3 ----- PIN3
- PIN5 ----- PIN5
 |
We open a TCP socket to 192.168.1.9 (configured IP-Address) and port 5000 and send the ASCII command *IDN? followed by <CR>. The device replies with HAMEG HM8115-2!
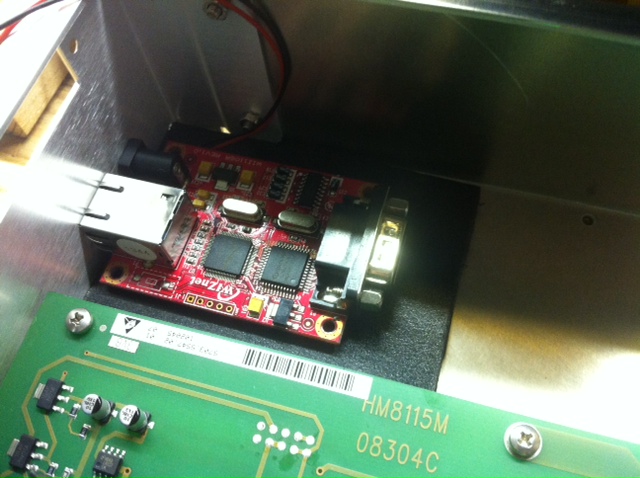
All that is left to do now is to somehow mount the WIZnet board plus a power supply into the HAMEG case. We turn around the serial interface and solder three wires to the SUB-D pads 2, 3 and 5.
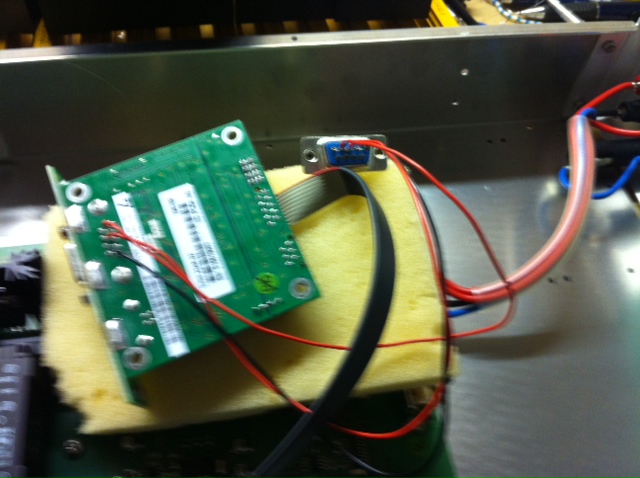 |
We then mount (hot glue) the WIZnet board into the case.
 |
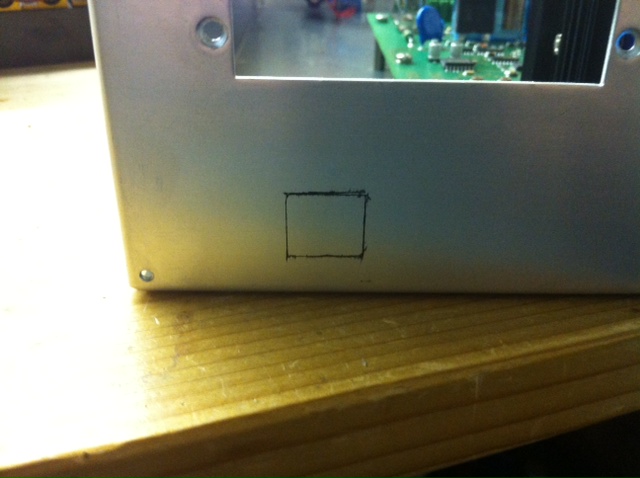
Here comes the ugly part. We have to mill a hole for the network connector into the back plane.
 |
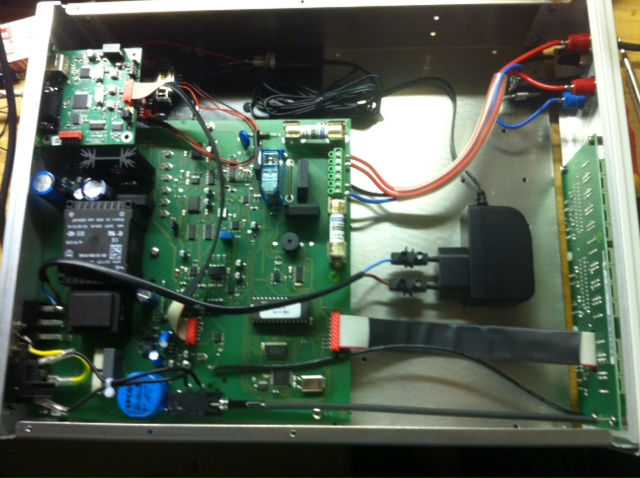
Once this is done we can hot glue the WIZnet board in place and remount the serial interface. I spent hours on trying to find a way to extract the required 5V for the WIZnet board from the mainboard. All those attempts failed. I finally installed a standard 5V power adaptor into the case and connected the 220V leads to the power input of the HAMEG (behind the switch). Thus the WIZnet board is powered on together with the HAMEG.
 |
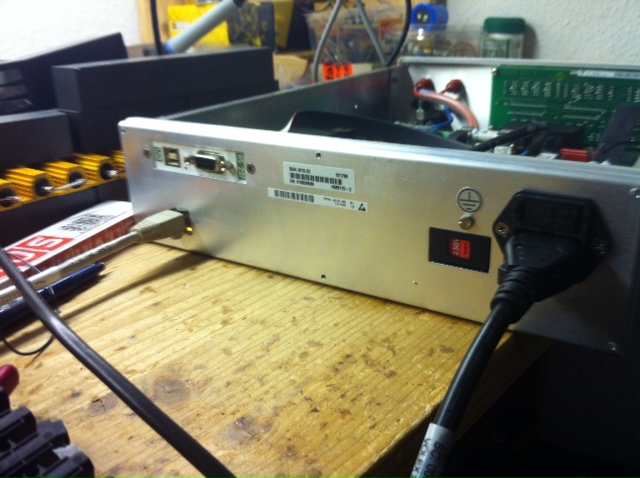
The backplane looks as follows now:
 |
We close the case power it up and attach a small test load.
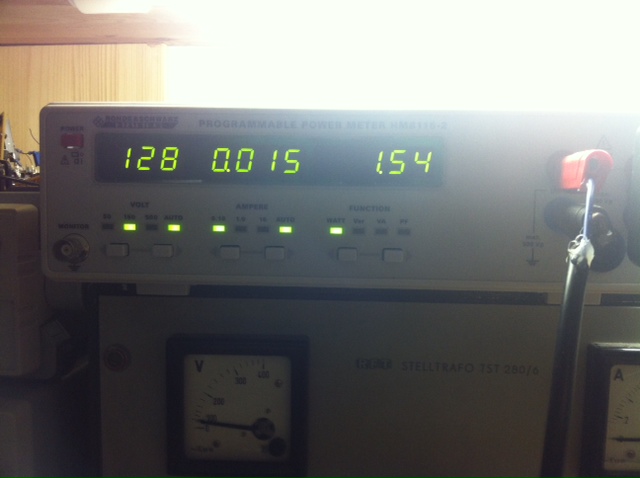 |
We get back to our MacOSX machine in the office and write a little Objective-C application that establishes a TCP connection to the WIZnet board sends commands and displays responses.
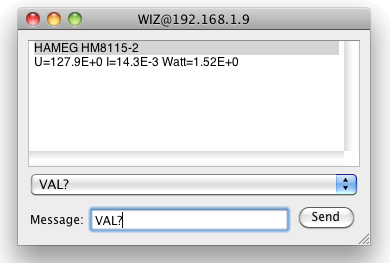 |
This works like a charm. The wattage can easily be extracted from the returned string. The HAMEG can now be remote controlled and easily integrated into computer controlled experiments.
News
| 23.04.2023 | Cassiopeia 2.9.0 released |
| 05.10.2022 | Cassiopeia 2.8.3 released |
| 29.09.2022 | Cassiopeia 2.8.0 released |
| 08.07.2022 | Cassiopeia 2.7.0 released |
| 14.04.2021 | Cassiopeia 2.6.5 released |
| 10.02.2021 | Cassiopeia 2.6.1 released |
| 26.06.2015 | Word Processor Comparison |
| 24.06.2015 | Updated Documentation |
| 23.06.2015 | Cassiopeia Yahoo Group |
| 18.06.2015 | Advanced Data Security |
| 11.05.2015 | Cassiopeia Overview |
| 08.05.2015 | Exporting to files |
| 14.05.2013 | LaTeX and HTML Generation |
| 08.05.2013 | Example Paper released |
| 26.04.2013 | Co-editing in a workgroup |
| 16.04.2013 | Equation Editor Quick Reference |
| 12.04.2013 | Equation Editor |
| 04.04.2013 | Links and Bibliography |
| 01.04.2013 | Books |
| 30.03.2013 | Documents |
| 28.03.2013 | Simulations |
| 16.03.2013 | 2D Graphs |
| 10.03.2013 | Symbolic Algebra |
| 08.03.2013 | Getting Started |
| 07.03.2013 | Installation and Setup |
White Papers
| 13.10.2015 | 01 Writing documents |
| 15.10.2015 | 02 Using the equation editor |
Youtube
| 08.07.2022 | Installation & Getting Started |
| 14.04.2021 | Animating Wave Functions |
| 26.01.2016 | Keystroke Navigation |
| 22.10.2015 | Equation Editor Demo |
| 19.06.2015 | Equation Editor Tutorial |
| 10.06.2015 | Sections and Equations |
| 09.06.2015 | Getting Started |
| 09.06.2015 | Damped Oscillations |
| 29.05.2015 | Solving equations |
| 13.05.2015 | Privileges and Links |
| 19.06.2013 | Magnetic Field |
| 14.06.2013 | Creating Documents |
| 10.06.2013 | Vector Algebra |
| 30.05.2013 | Differential Simulations |
Contact
Smartsoft GmbH Advanced Science Subdiv.Support: support@advanced-science.com
